RStudio Server Instructions
Table of contents
- Overview
- Connecting to the server
- Starting an RStudio session
- File management
- Saving your work and finishing the session
Overview
The DEAC Cluster is the high-performance computing (HPC) cluster at Wake Forest. The cluster has a lot of useful software pre-installed, including R (with many important packages) and Python. As getting Python set up on your personal computer can be a bit annoying, in this course we will use the DEAC Cluster to work with Python.
One of the cool things that the cluster provides, through DEAC OnDemand, is the ability to connect to the cluster in your browser and open interactive RStudio sessions. This will allow you to use R and RStudio remotely in a very similar way to how you use them locally, while also providing the additional software we need.
Connecting to the server
Our class has its own site on the DEAC OnDemand cluster at the following url:
To get started, click on the link and log in with your usual WFU credentials.
Note: Connecting requires you to be on campus WiFi. If you are off-campus, first connect via VPN; see the VPN overview and installation instructions from Information Systems.
Once you log on, you will see the STA 279 course homepage, with links to RStudio and VS Code at the bottom (you can ignore VS Code, although you are certainly welcome to use it if you like).
Starting an RStudio session
Click on the RStudio app at the bottom of the course homepage. Before opening RStudio, you will be taken to a page in which you will configure details for the RStudio session.
Working directory and slurm
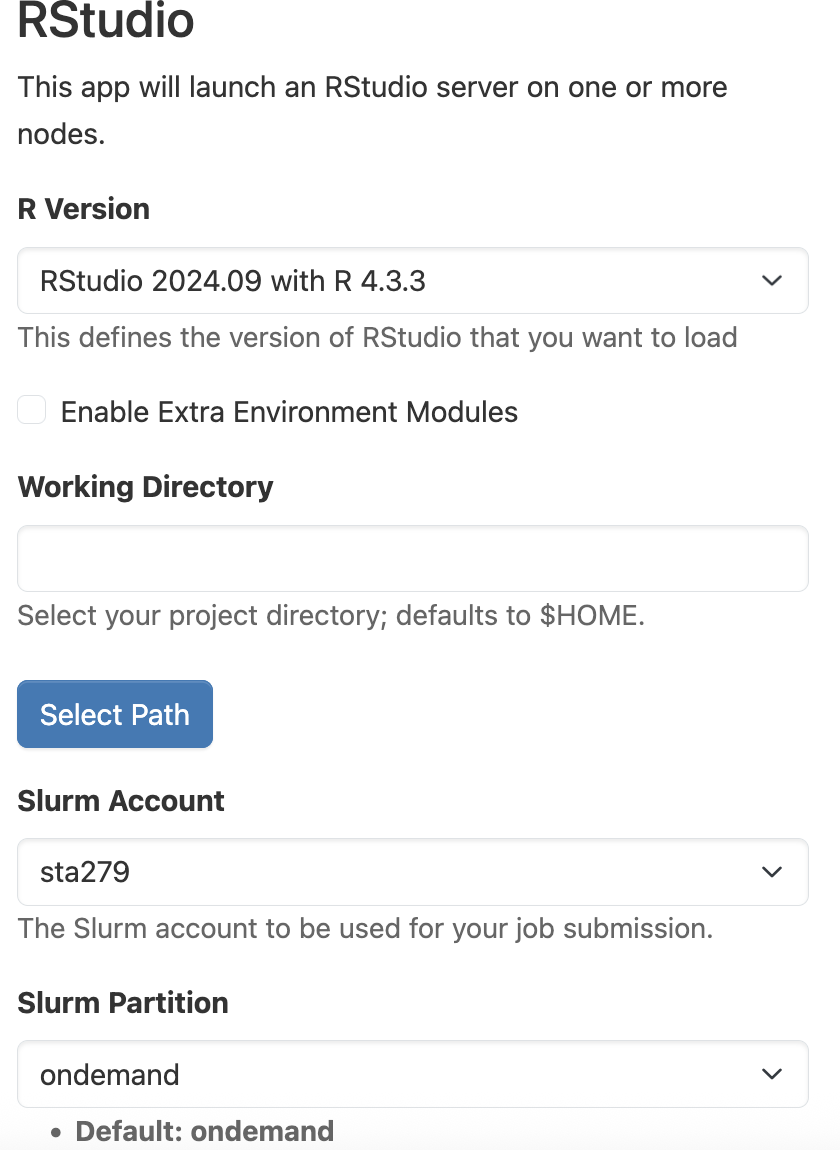
At the top of the page, you will enter information about the working directory, slurm account, and slurm partition that you want to use for the session:
Working directory: For the working directory, use /deac/sta/classes/sta279/USERNAME, replacing USERNAME with your Wake Forest username (e.g., my path would be /deac/sta/classes/sta279/evansc)
Slurm account: Select sta279 from the drop-down menu
Slurm partition: Select ondemand from the drop-down menu
Resource request
Below, you will then need to specify how much resources you want for your RStudio session.
This step is very important! The DEAC cluster does not have infinite resources, and the DEAC team are kindly allowing us to use the cluster for our course. The settings you enter in this configuration page specify how much of the cluster resources you are going to request for your RStudio session.
There are three types of resources to specify: time, cores, and memory. To be respectful of other users, never request more resources than you need. Follow these rules when requesting resources for our course:
- Hours: For in-class work (practice questions, working on HW during class time, etc.), request 1 hour. For work outside of class, do not request more than 3-4 hours at once, and request less if you know you will be working for less time. You can always save your work and start a new session if you end up working for longer!
- Cores: For this class, 1 core should generally be sufficient. Unless explicitly instructed, never request more than 2 cores in our class.
- Memory: For this class, 8 GB should generally be sufficient. Unless explicitly instructed, do not request more than 16 GB.
A standard request will look like this, with 1 hour, 1 core, and 8 GB requested (always use node type = Any):

Once you have configured the session correctly, submit the request at the bottom of the page.
Connecting to the server
Once you have submitted your session request, the request will be queued on the cluster. When there are available resources and it is your turn in the queue, the session will be ready to start (generally this should only take a minute), and you will see the following page:
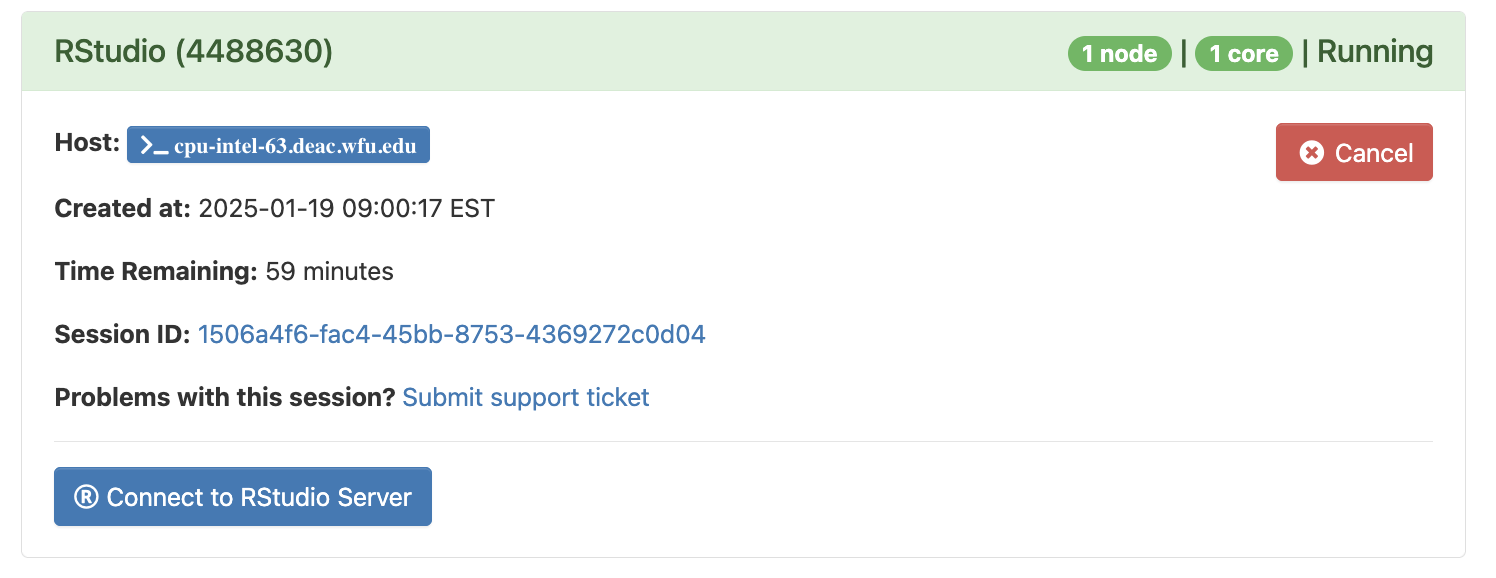
This page tells you that you have a session running, provides some details about the session, and tells you how much time is left. To enter the session and open RStudio, click the Connect to RStudio Server button. This should open RStudio in a new tab in your browser.
File management
Your session should be initialized in the working directory /deac/sta/classes/sta279/USERNAME on the cluster. This working directory is a folder which will store all of the classwork you do on the DEAC cluster for this course. In the Files pane of RStudio, you should see a list of files in your working directory (if this is the first time logging on, the directory may still be empty).
Most of the coding work you do in this course will be submitted through GitHub, so typically you shouldn’t need to move files between the RStudio Server and your local computer. If you do, however, then you can upload files with the Upload button on the files tab:

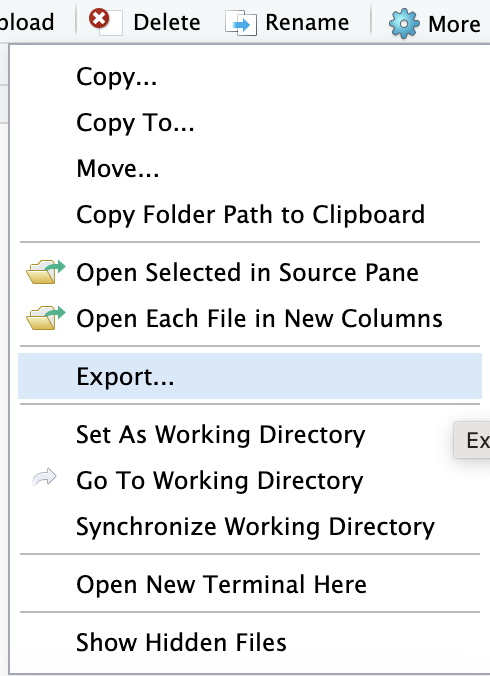
To download files, select the files you want to download (click the checkbox next to them in the file list), then click on More -> Export...
Saving your work and finishing the session
When you are done working for the time being (note: I do not mean finished with the assignment, I just mean that you are pausing active work on the assignment), it is very important that you save your work before quitting the session.
Do the following:
- Save any files you have changed
- If working on an assignment from GitHub:
- Stage any files changed since the last commit
- Commit any changes
- Push to GitHub
- Once everything is saved, committed, and pushed, close the RStudio Server window in your browser
- Back on the class dashboard, your Interactive Sessions page should still show the current RStudio session. Click the red Cancel button, and click OK to confirm.
Cancelling our sessions when we stop using them is very important, because it gives the resources we requested back to the DEAC cluster! Do not leave a session running if you are not using it, regardless of how much time is left on the session.