Git and GitHub assignment instructions
Table of contents
- Git and GitHub
- Initial setup: File system + R + RStudio + Git + GitHub
- Your first assignment through GitHub
- Step 1: Open the assignment link
- Step 2: Log in to GitHub
- Step 3: Join the Classroom (only needs to be done once!)
- Step 4: Accept the assignment
- Step 5: Clone the repository to your local computer
- Step 6: Pull
- Step 7: Work on the assignment
- Step 8: Commit your changes
- Step 9: Push your changes to GitHub
- Step 10: Request feedback
- Step 11: I provide feedback
Git and GitHub
Git is a version control software that allows you to view changes to files over time, revert to earlier versions of files, and save new versions and changes. GitHub is a website for storing work which supports Git version control features. On GitHub, for example, you can easily see edits to each file in a repository, compare different versions of code over time, and manage branches and contributors to large projects.
A good analogy is to think of Git working like the track changes feature in Word, but with a lot more options, control, and features. GitHub then functions like Box or DropBox, hosting your files remotely and allowing others to access and (possibly) edit them. While Git allows you to perform version control locally on your files, GitHub allows you to share files and edits with others.
Git and GitHub are widely used in both industry and academia for collaboration and sharing code. In this course, we will use them to submit code for assignments. I have created a GitHub Classroom for this course, which will allow me to share assignment repositories and starter code with you. Your workflow will be to:
- Accept assignment invitations, creating a new repository on GitHub for each of your assignments
- Clone the assignment repository to your local machine
- As you complete the assignment on your local machine, you will commit and push your changes to the remote repository on GitHub
- Once you have finished the assignment and pushed to GitHub, you will request and receive feedback from me through GitHub
Full details on these steps is provided below.
Initial setup: File system + R + RStudio + Git + GitHub
Before completing your first assignment, you will need to get all of your software set up and talking to each other. This means that you will need to install R and RStudio (if they are not already installed, or update them if needed), install Git, set up a GitHub account, and connect Git, GitHub, and RStudio. For the Git and GitHub setup, and the connection with RStudio, see the book Happy Git and GitHub for the useR. You should also prepare a folder on your local computer that you will use for your classwork in 279 this semester.
Step 1: Local file organization
Create a folder on your local computer to store your work in this class. I would recommend calling it something like sta279-f25-work, and saving it somewhere permanent and accessible (NOT your Downloads folder, e.g.). For example, on my computer I created the folder ~/Documents/sta279-f25-work (storing it under Documents). When you later accept assignments through GitHub Classroom, you should store them in this folder, with a subdirectory for each assignment.
Step 2: Install or update R and RStudio
Install or update R and RStudio; see the R and RStudio installation instructions on the course website, and Chapter 5 of Happy Git with R. If you have not updated your versions of R and RStudio in a while, make sure to do so at the beginning of this course!
Step 3: Set up a GitHub account and send me details
Set up a GitHub account, if you don’t already have one from a previous course. See Chapter 4 of Happy Git with R.
Once your account is created, email me your GitHub username.
Step 4: Install and set up Git on your machine
Install and set up Git on your machine; see Chapter 6 and Chapter 7 of Happy Git with R. Chapter 8 also discusses options for Git clients to make interacting with Git locally on your computer easier / more visual. You can safely skip Chapter 8 (we will work with a curated subset of Git functionality in this course, so a client is probably not necessary for your Git interactions), but you are more than welcome to install and use one if you like.
Step 5: Set up credentials for interacting with GitHub
Set up credentials for interacting with GitHub; see Chapter 9 of Happy Git with R.
- If you are connecting to GitHub on your personal computer, I highly recommend using the HTTPS approach described in Chapter 9
- Briefly, you will create a Personal Access Token on GitHub (section 9.3), save your PAT (section 9.4), and then store the credentials (section 9.4.1)
- Important: In addition to store the credentials through RStudio, make sure to store your PAT somewhere secure (like a password manager) where you can access it again when needed!
- If you are connecting to GitHub on the RStudio server through DEAC OnDemand, you can use HTTPS, but your PAT will not be stored, meaning you will need to enter your GitHub username and PAT every time you want to do anything remote. For GitHub on the RStudio server, I recommend the SSH approach discussed in Chapter 10 instead. Since it is perfectly fine to have multiple sets and types of credentials, I suggest doing the HTTPS setup first on your local computer, and then worrying about the SSH setup later when you need to use the RStudio server
Once these initial steps are complete, proceed to the next section below, which describes the steps for joining the GitHub Classroom and completing your first assignment.
Your first assignment through GitHub
This section describes the steps for accepting and submitting your first assignment on GitHub Classroom. The first time you do this, you will also join the GitHub Classroom for this course. To give you practice with these steps, I have created an example assignment which you can submit, and which I will walk you through in detail in this section. Completing this assignment is part of the course participation grade. For future assignments (homeworks, challenges, projects), your workflow will be very similar, with the difference that you will not need to re-join the classroom, and the specific assignment and repository names will change.
Step 1: Open the assignment link
Go to Canvas. Under Assignments, click on Example Assignment. Click on the GitHub Classroom link provided in the assignment description.
Step 2: Log in to GitHub
If you are not already logged in, GitHub will prompt you to log in to your account:
Step 3: Join the Classroom (only needs to be done once!)
The first time you click on an assignment link, GitHub will ask you to join the GitHub Classroom for the course (sta279-f25-statcomp-classroom). Click on your email address from the list of identifiers. Important: Once you click on an identifier, GitHub will link your account to that email address. Do not click on anyone else’s email, only your own!
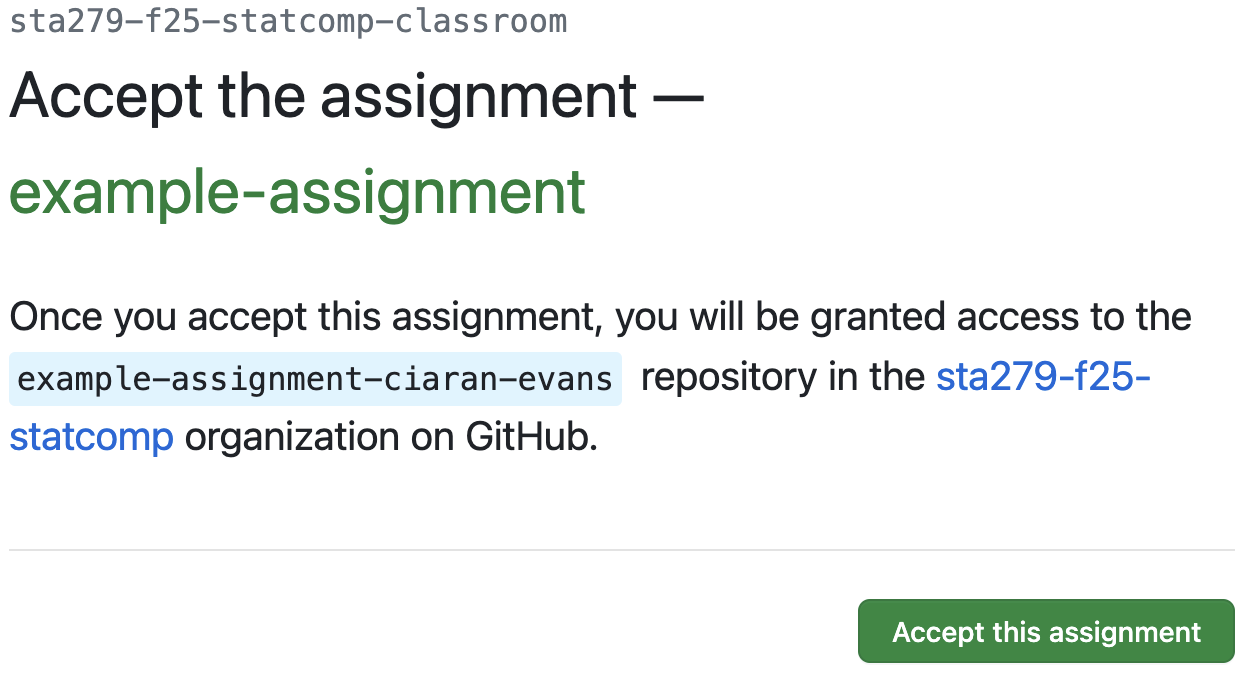
Step 4: Accept the assignment
You will now be prompted to accept the assignment (in this case, example-assignment). This will give you access to a new repository on GitHub called example-assignment-USERNAME (e.g., example-assignment-ciaran-evans). Click the green “Accept this assignment” button.
Once you have accepted the assignment, you will be taken to the assignment repository on GitHub (e.g., example-assignment-ciaran-evans). In the example assignment, there are two files already in the repository: README.md provides some information about the assignment (short because full assignment instructions are on the course website), and example_template.qmd provides a Quarto file with starter code.
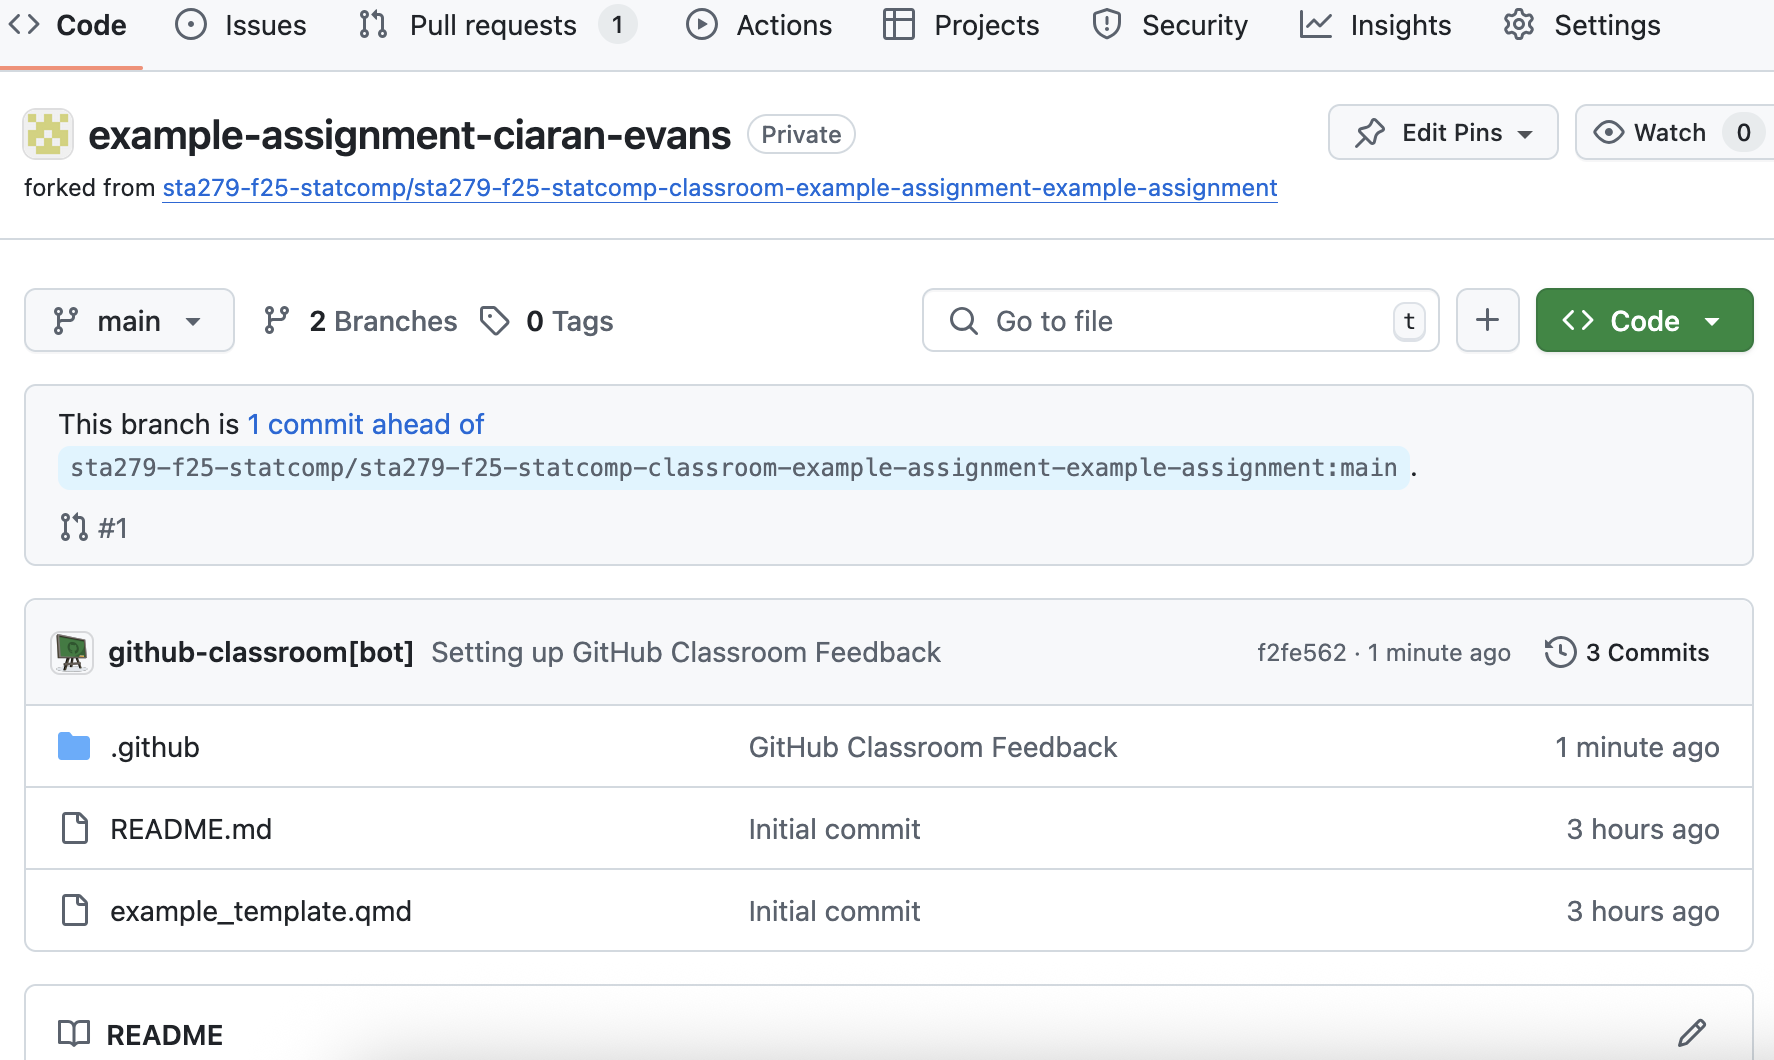
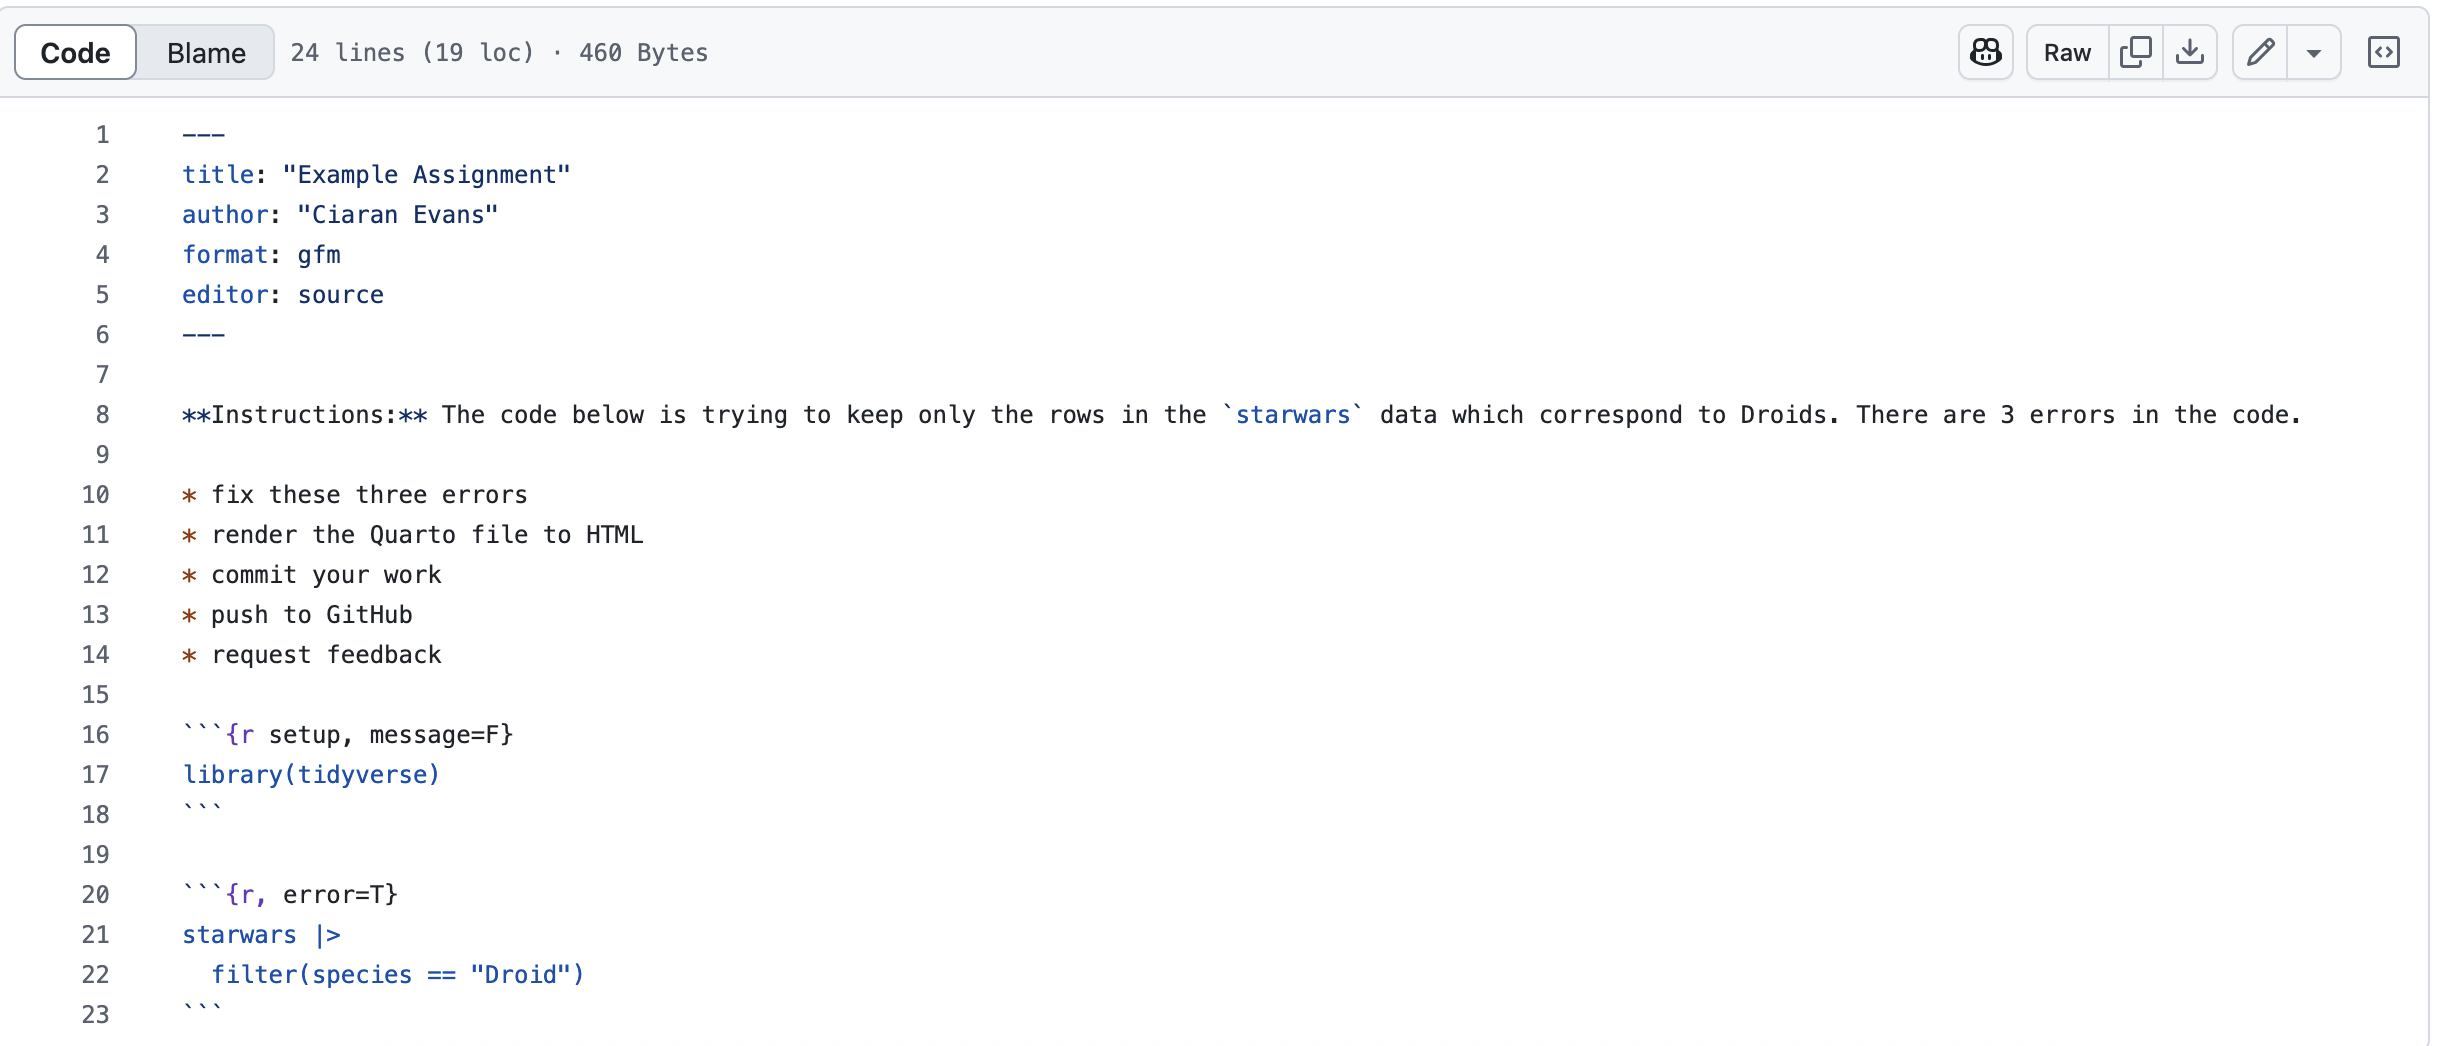
If you click on the example_template.qmd file, for example, you will see a chunk of R code with some errors that need fixing.
Step 5: Clone the repository to your local computer
Click the green “Code” button, and select HTTPS. You will see a web URL that you can copy to the clipboard:
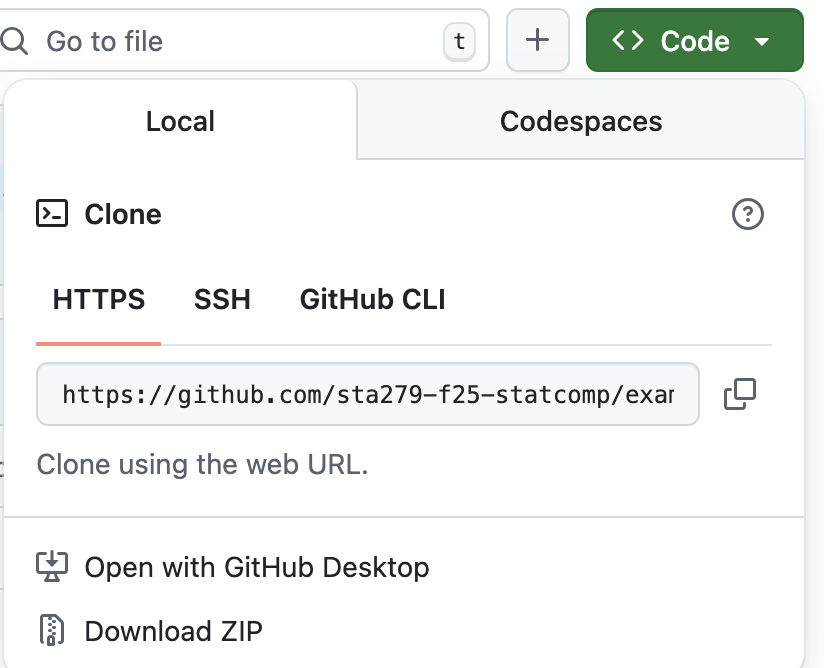
(Important: if you have used the SSH key instead of Personal Access Token setup, e.g. because you are connecting from an RStudio server, then you should instead select “SSH” and copy the corresponding SSH URL)
Click the icon next to this URL to copy it to the clipboard

Now open RStudio, and click File -> New Project. This will open the new project wizard. Select Version Control

Then select Git

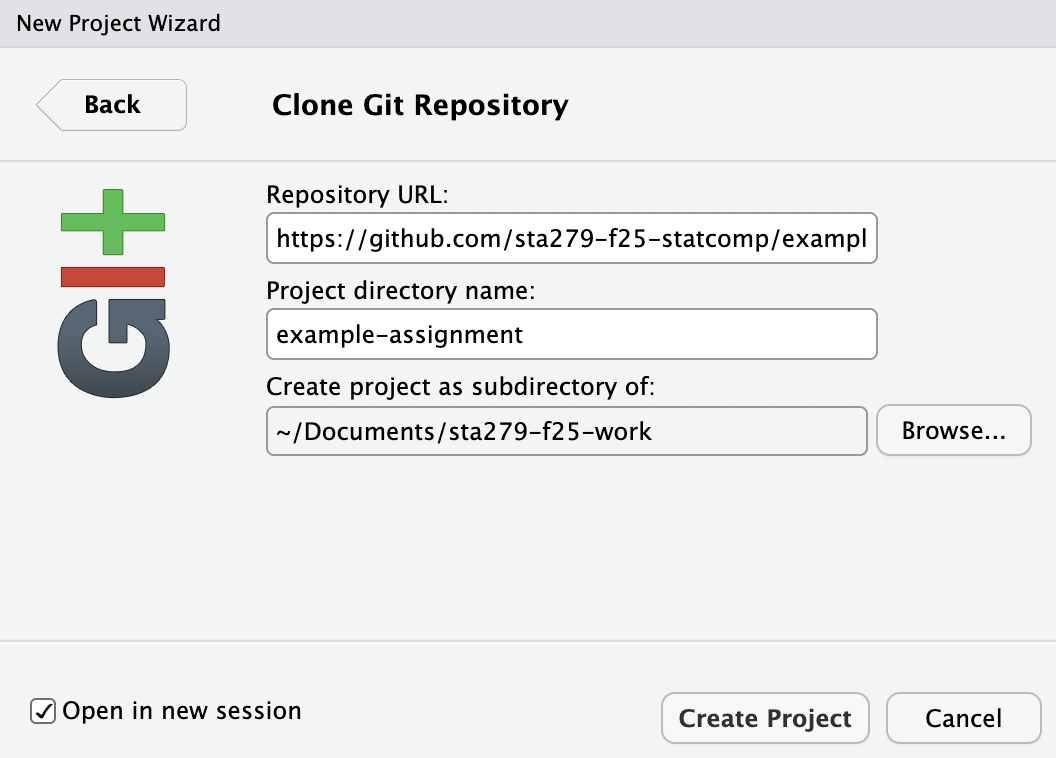
The project wizard will then ask for Git repository info.
- Paste the URL you copied from GitHub into the “Repository URL” field.
- Under “Project directory name:”, enter the assignment name (e.g.,
example-assignment). - Under “Create project as subdirectory of:”, browse and select the folder on your local computer that you created for your work in this class (e.g.,
Documents/sta279-f25-work). - Select “Open in new session”
- Then click “Create Project”.
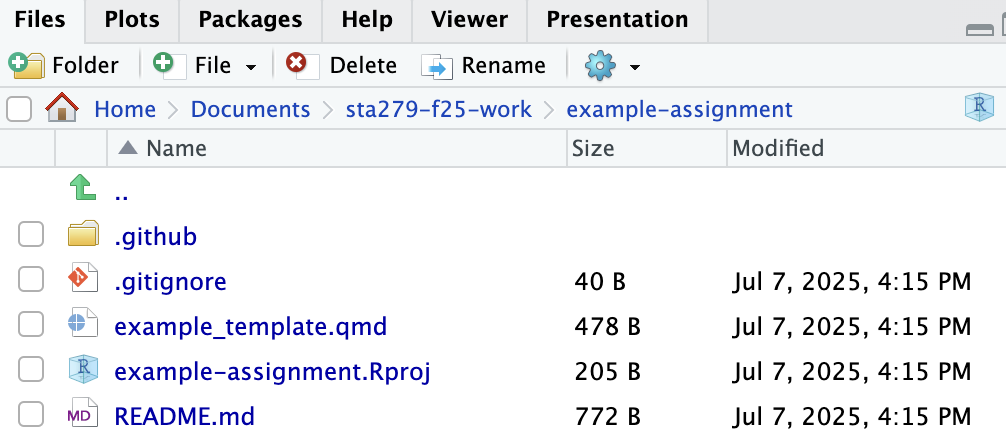
This will clone the repository from GitHub to your local computer, and will create a new R project in that repository. This project will then be opened as a new RStudio session on your computer. In the new RStudio session, click the Files viewer (next to Plots, in one of the four panes). You should see the files for the example assignment repository:
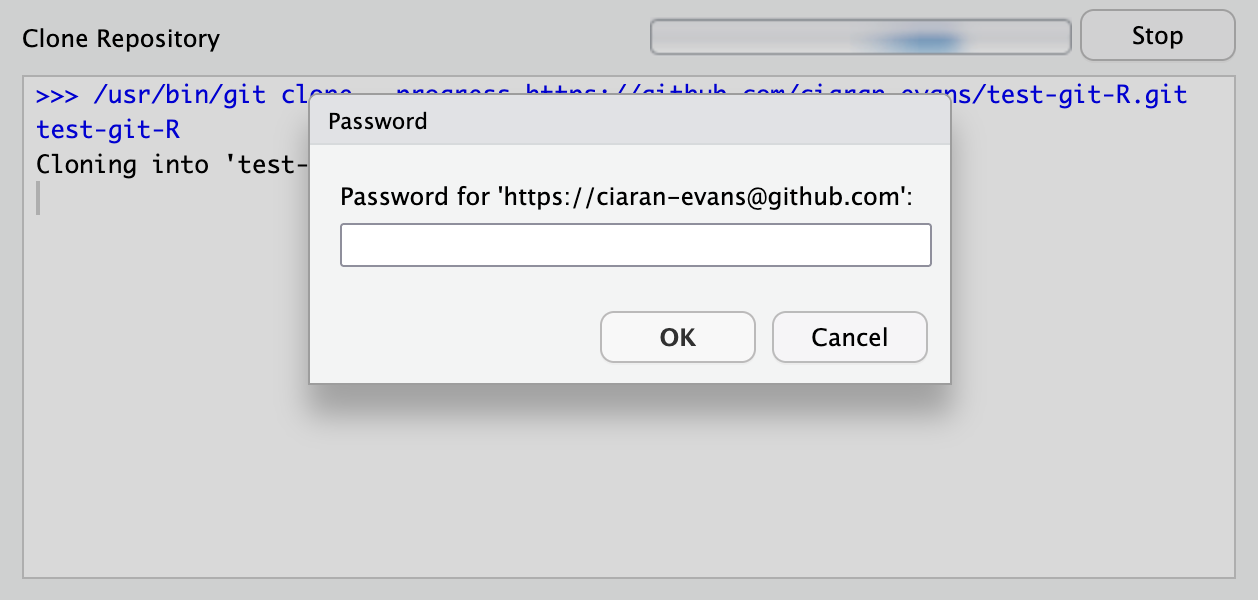
It is possible that the first time you try to clone/pull/push from RStudio, you will be asked to enter your GitHub username (e.g., ciaran-evans) and your password (that is, your Personal Access Token, not the password you use to sign in to GitHub on the browser):
Step 6: Pull
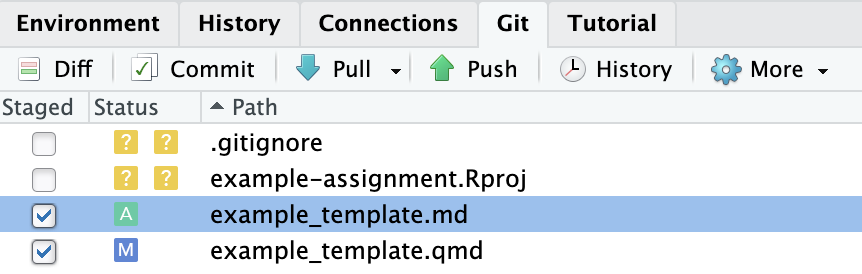
In one of the panes on RStudio, you should see a Git tab, which has the Git tools (pull, staging, commit, and push) that we will use to save work and interact with GitHub:

Before doing work in the repository, pull from the remote GitHub repository (click the “Pull” arrow, pointing down). Try to make this a habit whenever you start work on an assignment, or go back to an assignment you have worked on previously. If you are the only one making changes to a repository, and you are only using one computer, then it won’t really matter, but it is still a good habit for the future. However, if you are working on the same code across multiple computers, or collaborating with other people, then pulling first is very important!
Because nothing has changed on the remote repository, you will get a message saying everything is up to date:

Step 7: Work on the assignment
In this example assignment, you are asked to fix errors in a chunk of R code. Open the example_template.qmd file from the assignment repository. You will see the chunk that you need to fix.
At the very top of the Quarto file, enter your name in the author field. Also, make sure that the format field is gfm (this will allow the rendered document to appear nicely on GitHub).
Now go ahead and fix the errors in the R chunk. When you are done, Render the Quarto file; this should produce a .md file in your repository.
Step 8: Commit your changes
Once you have made changes in the repository (e.g., made progress writing a function, completed part of the assignment, etc.), you will want to commit your changes. A Git commit takes a snapshot of your current repository (kind of like saving an essay as essay1_rough_draft.docx, only much better). As you complete more of the assignment, you will take more snapshots (more commits) of the update code, and the latest commit has your most recently stored version of the code. However, you can always look back through the previous commits to see what you have changed, and revert to a previous version if necessary (e.g., if it turns out you made a mistake in a later change which caused a bug in your code).
For an extended homework, challenge, or project, you should commit multiple times. In a homework assignment, plan to commit after you finish each coding question. In a project, plan to commit after you write a cohesive section of the code (e.g., some important helper functions).
To make a commit, go to the Git panel in RStudio, where you will see any files which have changed since the last commit. You can ignore files like the .gitignore and the .Rproj files. Select the box next to the files for your work (.R, .qmd, .md, etc) to stage them for a commit (if you have used Git previously, this is just doing a git add). In the example assignment, you should stage the example_template.qmd and example_template.md files.
Once you have selected all the files you wish to commit, click the “Commit” box. This will open a new window for the commit, in which you can see the selected files you staged, and the changes you have made to those files (insertions are in green, deletions are in red):
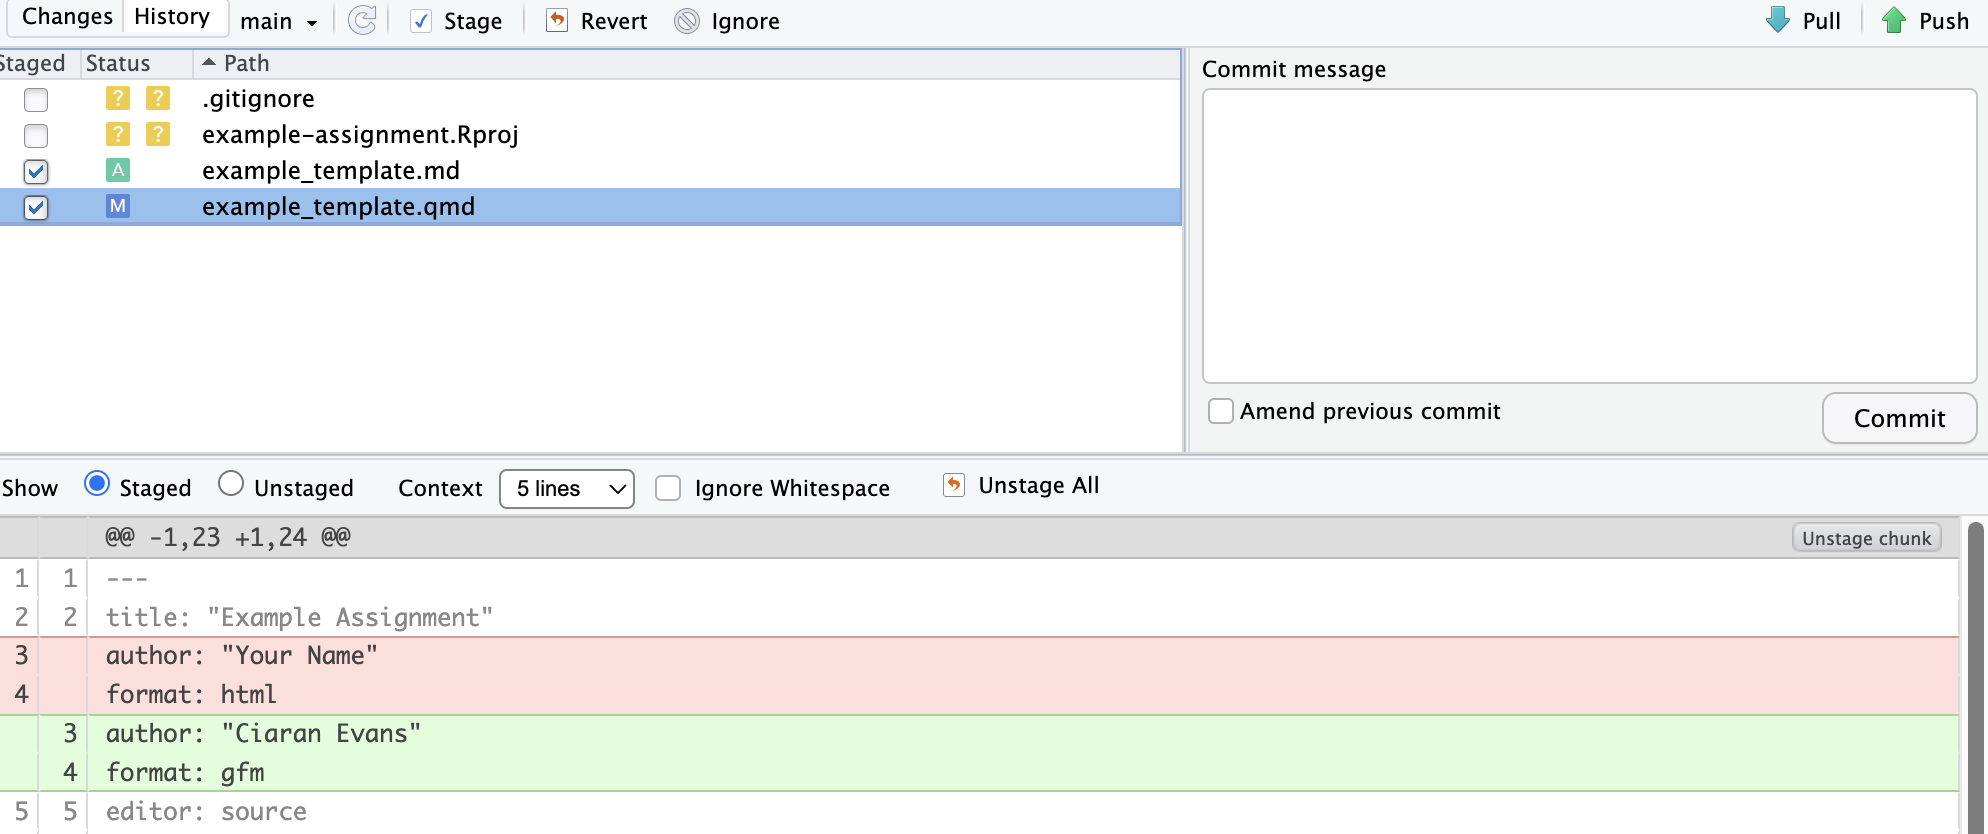
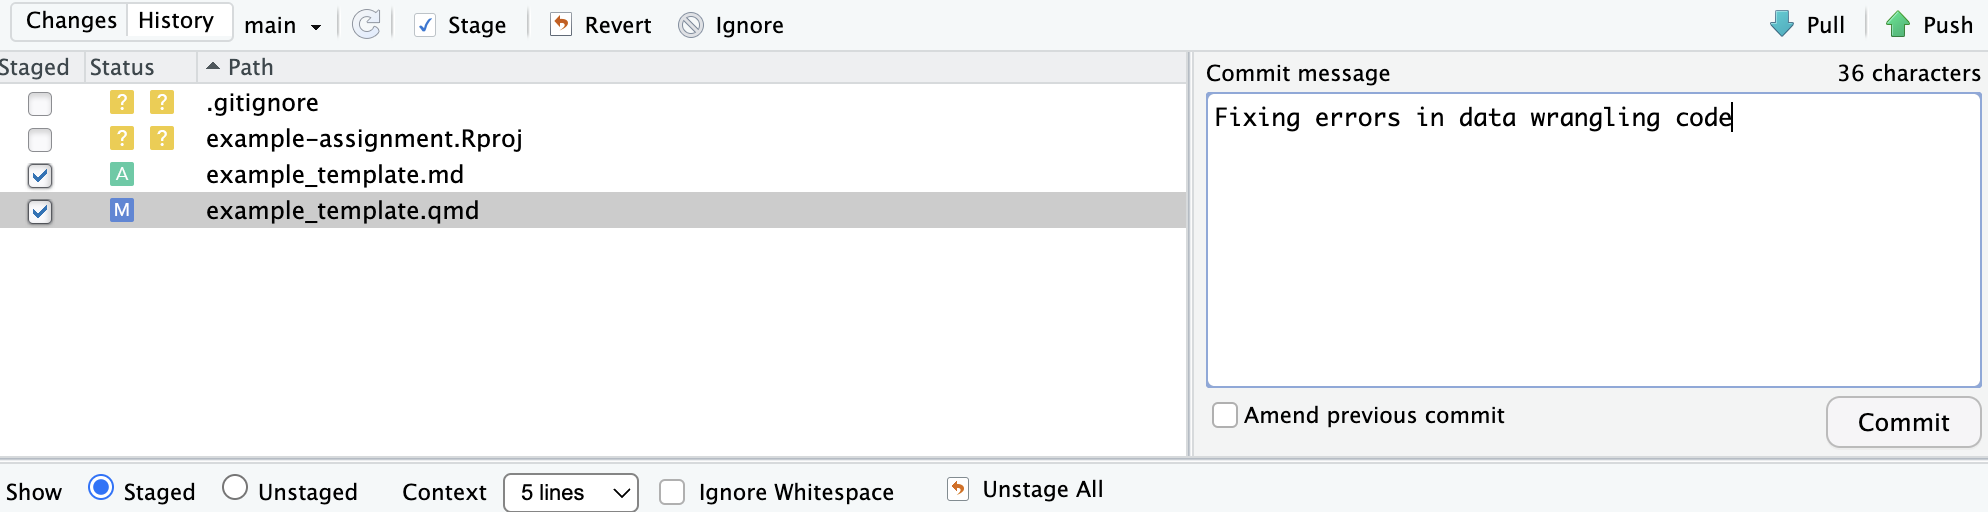
In the top right, you can also see a box to add a commit message. Enter a short, meaningful message here to describe the commit:
Then click the “Commit” button below the message box. You should see a pop-up “Git Commit” box once the commit is complete:

You can close the commit boxes now.
Step 9: Push your changes to GitHub
Now you have committed changes to your local Git repository, which means that there is a difference between the version of the code on your local machine, and the version on the remote repository. Indeed, in the Git tab on RStudio, you can see that there is a message saying that your local branch is ahead of the remote branch (origin/main) by 1 commit:

We want to share the changes in our code with the remote repository. First, if the remote repository on GitHub is up-to-date, you could access your current code from other computers, and collaborators can have the latest edits. Second, if something happens to your local computer, you still have a back-up of all your code on the remote repository. And finally, for the purposes of this class, pushing to GitHub is how you will share your code with me for grading and feedback!
A push is how we send code from a local repository to GitHub (whereas a pull, recall, is how we go the other way to get code from GitHub to our local computer). Once you have committed your latest changes, click the “Push” button (green arrow, pointing up) in the Git panel in RStudio. You should get a message saying that your changes have been pushed to GitHub:

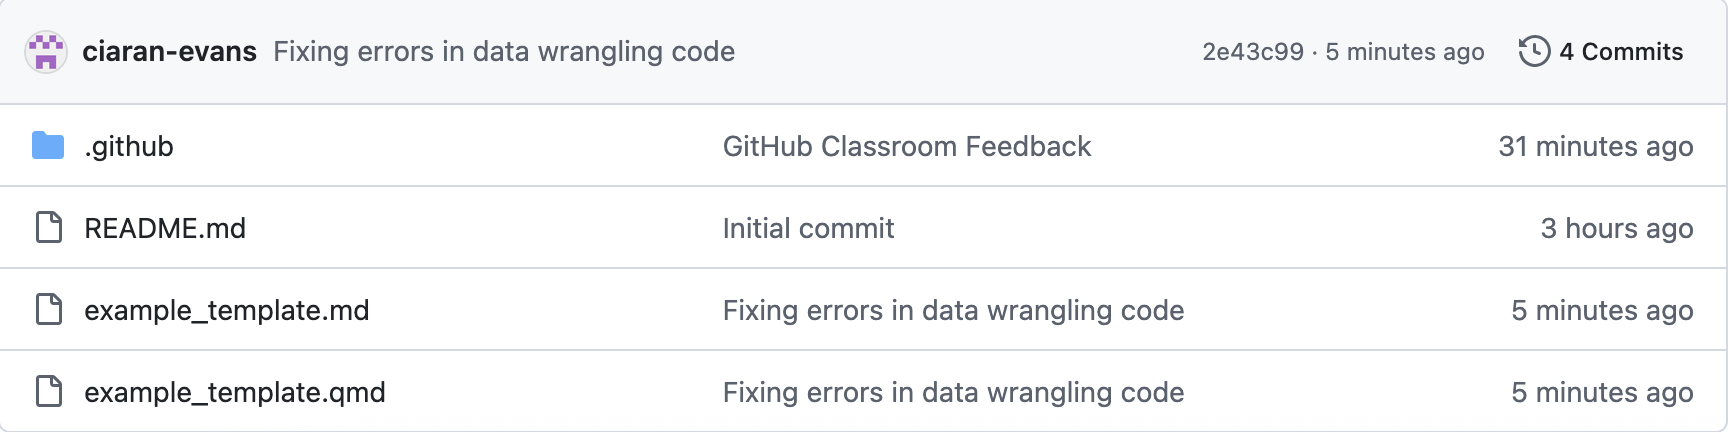
You can close the pop-up message. Once you have pushed to GitHub, go to your web browser and navigate to the repository on GitHub. In the file list, you can see the corresponding commit message next to the file(s) that you have changed:
If you click on the file, you can see that the updated version is now on GitHub:
As with commits, you should push to GitHub multiple times throughout the course of working on your assignment. As a rule, push each time you make a commit.
Step 10: Request feedback
Once you have completed the assignment and pushed the final version of your work to GitHub, it is time to request feedback from the grader (me!). The way we will do this is with a Feedback pull request. Now, a pull request is really for requesting that changes on one branch be merged into another branch in the repository, but for simplicity we will not work with branches in this course (though you are welcome to try them out if you like!). Nevertheless, GitHub Classroom allows me to make an automatic pull request called “Feedback” which is created when the assignment repository is created. You can think of this pull request as a way for me to make comments on your code, for you to reply to my comments, and for us both to see the history of comments, requested changes, and commits.
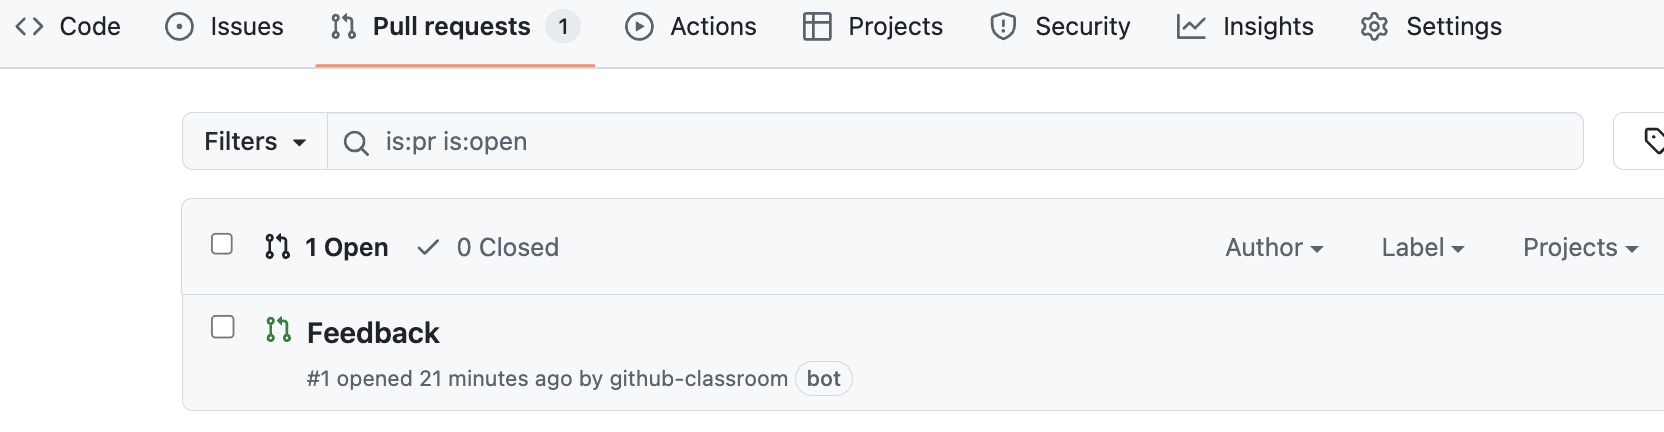
In the GitHub repository, navigate to the “Pull requests” tab. There should be one open pull request, called “Feedback”:
Click on this pull request. The pull request has tabs for Conversation (for us to make comments on the code), Commits, Checks (ignore this for now), and Files changed. Under the Conversation tab, you can see some information automatically populated by GitHub Classroom, and a list of the commits to the repository:

Very Important: DO NOT close or merge the pull request! You should only ever request reviews and make comments.
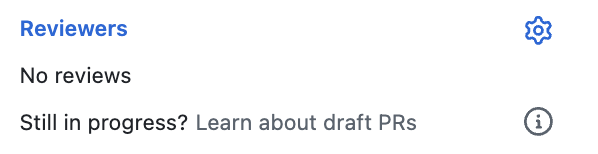
To request feedback from me, click on the gears symbol next to “Reviewers” on the right:
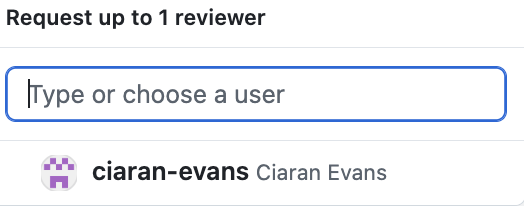
Click on my name (ciaran-evans) from the list that comes up:
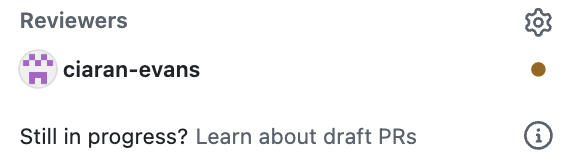
You should see that I have been assigned to review the code, and you are waiting for my comments:
Step 11: I provide feedback
Now it is my turn to look at your code, and provide feedback. I will leave comments on your code, and summarize your overall performance on the assignment:
